Jewellery photos we see on the website have a glittering and luxury look. But the pictures hadn’t had that shiny look. From my 7 years of experience in jewellery photo editing at colorclipping, I can assure you that the amazing look of jewellery photos is only possible by jewelry retouching.
Today I am going to show you an example of my jewelry retouching. In this month, one of my clients sends me the jewelry image to make it shiny and preserve its natural look.
From the picture you can see that there were lots of spots, blemishes or even scratches, beneath the jewellery a wax, the picture isn’t that much shiny, and most importantly the reflection of the background reduces the natural tone of the white gold. Please don’t be surprised seeing the after retouching a photo. Here it is.
I didn’t play any magic; I just did what I am doing for 7 years. Now I am going to write what I did to enhance this jewelry in brief.
- Clipping path
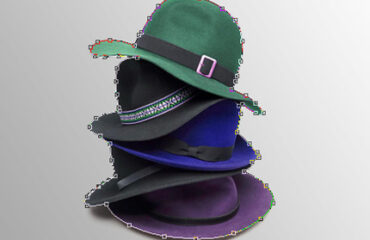
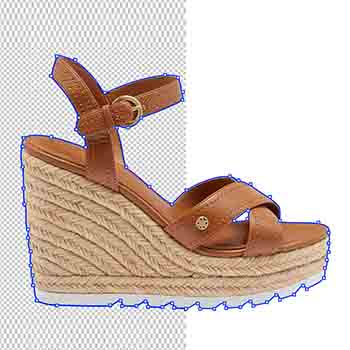
At first, I clip out the unnecessary details of this photograph. Its mandatory to cut out the “not required” background from the image. For clipping path, I select the pen tool and make the selection by drawing a path around this jewelry. Here is the process how I do the clipping path–
- White background
Whenever I have completed drawing a path, I go for making the background white. To make white background follow these steps:
At first, I open your Layers window. Then I duplicate Layer and drag the photo layer to the New button to duplicate it. I suggest duplicating layer because it’s for safety measurement: if I really mess things up, I can go back to the original anytime. Then I select the top layer and go to Image > Adjustments > Levels to make it White. I adjust the sliders until the image’s background is pure white with little faint shadows.
I always prefer to include faint shadows. As it makes the bottom edge look nicer. And the faint shadow is usually better than no shadow.
- Wax remove
As you can see the before image contains a portion of wax beneath the ring. This kind of wax is seen mostly for jewellery. This is obvious to place a wax beneath the jewelry to stand it upright or positioning the camera. So I am used to removing wax from the jewellery.
- Metal part gradient
Normally I retouch metallic parts that involve 3 aspects.
Upon enlarging the image, there were clearly visible fingerprints and other soiled parts and needs to be eliminated. I remove dust with Spot Healing Brush Tool. I prefer this tool in Photoshop, as it scans area external to brushwork, dissects the shapes and then implements colour with value retouching. successfully depending on ambience objects. Though the tool perfectly removes speckles on large surfaces but ineffective for dust sticking to edges. Whether the ‘Patch’ tool helps me to substitute outlined surface with another source image in good condition. Healing brush spontaneously matches value and colour and as such one, I indicate the selected texture only. For dirt on edges, as you can see, I remove them effectively and preserve base gradient/ colour impeccably. Therefore, this jewellery image gets the smooth transition to the source image.
As second steps of the metal part gradient, I set right the distortions and bring it out by the reflection of ambience light. As this jewelry has colourful gems it has a tendency to reflect light with its facets, thus it causes undesirable blur. To counteract the reflection due to the lens of camera, light sources, and the bad effect of the rear shank, I have created an extensive library of idealistic reflections; which I use here for substituting reflections that are hard to mend. With ‘Brush’ tool, I eliminate the shabby reflection. And some blackish reflections are also removed with healing brushes.
As for the third aspect, I correct the colour of the metal part. There is a number of ways to ameliorate the metallic sheen and colour. In order to ensure consistency of metallic hues and warmth of colour tones, I toil meticulously using the tools available in Photoshop. Thus, the final image’s quality becomes turbocharged through critical colour improvement.
- Diamond sharp
Retouching gems and precious stones
Gem photography, particularly diamonds, tests the skills and nous of the artist. As you can see in the before image there is a number of blur parts. The imperfections are visible on the surface and are contingent on the stones’ cut and type. Glare is apparent on gem’s face because the white light in abundance is directed on flat surface or facets is exposed wrongly to light. But after my retouching, I manifest the real depth of precious stones along with inherent colour and clarity, as you can see.
- Stone sharp + colour enhance
In this specific image, I regulate gem’s brightness and make the true colour appear with ‘Brightness and Contrast’ tools. The gem’s shadow is highlighted with ‘Levels’ tool. Selecting and retaining the desired colours are affected by ‘Hue and saturation’ tool. I make all facets of gems stand out with ‘Unsharp Mask’ tool. The side of stones is sharpened adequately with ‘Smart Sharpen’ tool.
- Jewellery colour correction- Remove background effect on the white gold
For lighting, there is an effect of background on the jewelry. In this image, the colour of the white gold is not reflecting in its actual colour. It’s a drawback. As a retoucher, I adjust the ideal colour of the gold. And for my client, I tried to capture the pure white gold shade in this image post-production work.
Jewellery Polish Levels
Like all other jewelry photos, this image also has some scratches and smudges which are revealed in the bright lights. I retouch to add polish to metal and gemstones for a more appealing look. Here, I maintain a consistent polish level as far it keeps the natural look of the jewelry.
Jewellery Retouch Cleanup
Jewelry is notoriously challenging to photograph and retouch. Metals and gemstones are highly reflective. Also, it shows fingerprints and dust, and customers want to zoom as large as possible to view the thinnest imperfection. Jewellery retouching helps to clean up smudges, control reflections, even out lighting, and create the desired glittering.
- Shadow for a natural look
I always prefer to creating a natural shadow effect. As the only shadow can make the jewellery more realistic with a natural feel. There to work on shadows, I stick to add depth that makes it more alluring to buyers. And the buyer of the gems is convinced to the true worth of jewelry for zero distraction. At final, I removing noise from photos to create a visual extravaganza around the jewellery that would step up demand significantly even though the market is saturated with similar products.
If you are really into online business, there are many things that you have to consider. Besides image retouching and improved require specific skills that only a professional possesses. This is why it is always recommended to outsource jewellery photo editing services. Color Clipping Ltd. has been one of the more preferred destinations for e-commerce businesses worldwide, let it be in your support or image improvement.


